wor·sted[woos-tid, wur-stid] noun 1. firmly twisted yarn or thread spun from combed, stapled wool fibers of the same length, for weaving, knitting, etc. Compare woolen. 2. wool cloth woven from such yarns, having a hard, smooth surface and no nap.
Showing posts with label Free Pattern. Show all posts

Thursday, March 1, 2018

Dr Seuss Inspired Cat in the Hat Free Pattern


Dr Seuss Cat in the Hat Free Crochet Pattern


So my son wanted a hat for Dr Seuss week at school. I couldn’t find a pattern online that looked like it would work for what I wanted; which was the right size, something that would work up fast, and was free. So I threw this one together and it worked great. I crochet while I watch TV shows or movies and was able to watch two episodes and get this done at the same time. I'm not necessarily the fastest/slowest crocheter in the world but I felt that the time was worth the investment. I could have done it faster following a pattern and not watching a show at the same time. I hope that helps you decide if it’s worth the time investment.


In this pattern I used an I hook, worsted weight yarn in Blue (Main Color) and White (Second Color). It will fit a 3-4 year old comfortably and fit ok on a 6 year old. My son chose blue and white but you can pick any colors you want. I also designed it to be big at the top and then taper in a little. You can leave out any row decreases and it will make the hat fit a larger child. I can stretch it onto a 22” mannequin head but it looks a little funky. So if you need that size then you should leave out the decreases, maybe keep one of them. You’ll need to adjust the brim increases accordingly as well.


MR- Magic Ring
Ch – chain
Hdc – Half-double crochet
St – stitch/stitches
BLO- back loop only
Hdctog – half-double crochet together
FLO- front loop only
FO- finish off

1. MR, 8 hdc
2. 2 hdc each st, join (16)
3. Ch 1, 1 hdc, 2 hdc (24)
4. Ch 1, 1 hdc in the next two st, 2 hdc (32)
5. Ch 1, 1 hdc in the next three st, 2 hdc (40)
6. Ch 1, 1 hdc in the next four st, 2 hdc (48)
7. Ch 1, 1 hdc in the next five st, 2 hdc (56)
8. This row worked BLO: Ch 1, 1 hdc in the next six st, 2 hdc (64) Switch to Second Color.
9-10. Ch 1, 1 hdc each st (64)
11. Ch 1, 1 hdc in the next five st, 2 hdctog (56)
12. Ch 1, 1 hdc each st (56) Switch to Main Color.
13-15. Ch 1, 1 hdc each st (56) At the end of row 15 switch to Second Color.
16-18. Ch 1, 1 hdc each st (56)
19. Ch 1, 1 hdc in the next four st, 2 hdctog (48) At the end of the row switch to Main Color.
20-23. Ch 1, 1 hdc each st (48) At the end of row 23 switch to Second Color.
24. This row worked FLO: Ch 1, 1 hdc in the next five st, 2 hdc (56)
25. Ch 1, 1 hdc in the next six st, 2 hdc (64)
26. Ch 1, 1 hdc in the next seven st, 2 hdc (72) FO

I only did three rows of blue (row 13-15) because I was low on blue yarn and wanted to make sure that I would get at least three rows on the last band of blue. I wasn’t sure how far it would go and since it went further I went ahead and did four rows for the second band of blue. You can make changes and add another row of Main color for row 16 and then switch colors. Just push the rows down one and have 27 rows at the end of your project.

This is my own pattern I made up. I would appreciate it if you would please link back here if you reference this or sell anything from it.


I hope this inspires you to try something new or to branch out on your own and create something new. J

Happy Crocheting!

~Heidi

Pin It

Thursday, August 11, 2016

Newborn Hat, diaper cover, and booties

I have a friend that had a baby and wanted to make something for her. When I found this pattern I had to try it. I think it turned out so cute! I couldn't decide on a blue to add as an accent so I decided to just leave it as gray. It was fun to make and pretty easy to do. It doesn't list the number of stitches that you are supposed to have at the end of the row on every row. So you have to count these to make sure you're on the right track but it's simple enough to verify you're doing it right. 


I'll be giving this to my friend today or tomorrow so I'm hoping she likes it. I love making baby gifts! I think they are the funnest ones to make.

~Heidi

Pin It

Wednesday, September 16, 2015

Crochet Nativity Set (Part 2): Shepherds, Sheep, & Donkey

I know I promised this up and done by last fall, and I am really sorry I didn't follow through with it.  I have an excellent excuse, you know.  Between the last time I posted the part 1 of the Nativity, we moved from Utah to Oklahoma for a while, and then on to Tennessee with the Army.  Then last Halloween I had my 4th son.  So the last year and half, things have been a little crazy, to say the least.

But better late than never right??

(Note: You can find Part 1 of the Nativity Set: Mary, Joseph, Baby Jesus, Angel, & Stable here!)

Presenting: 

Crochet Nativity Set (Part 2):
Shepherds, Sheep, & Donkey


For the shepherds I used the same designer and writer (6ichthusfish) that made the earlier set.  You can find the pattern for the shepherds here:


My changes:

I did not make the finger puppet versions, and stuffed mine.  I also wanted to make them a little bigger than her designs and used a G hook.  Belt:  I really only liked chained only belt (brown one), going back on it with a sc made it thicker than I wanted (the green one).  If you prefer to do the sc, I suggest using a smaller hook.  I used the long beard pattern for the white one, and the short for the brown.  I haven't yet made a crook that I like, this one above is just a twist tie I did really quick.  I wanted to get the patterns up asap and haven't made it to Hobby Lobby yet.

That's it!

Now, her pattern design didn't include animals... but what Nativity is complete without the animals, right??

So for the last 2 years, I have searched for patterns for the animals that would preserve the integrity of the style of the Nativity characters I already made.  Most designs were too cartoon-like for what I wanted.  I thought of making my own, but I didn't know clue one about designing crochet animals.  This last month, though, I have been on bed rest with the pregnancy and I had time to learn the basics about crocheting dolls, and I learned so much, I was finally able to sit down and design the animals that had been floating around in my head these last couple years.  So here are my patterns, originals by me, Cat, for your private use.  If you choose to sell anything you make, please make sure you give credit to me and this website for your designs.  (Also don't forget to properly credit 6ichthusfish for her beautiful designs as well.)

Sheep Pattern for Nativity

Pattern and Design by Catherine Lang 2015 @ theworstedcrochetblog.blogspot.com 


You will need:

-F Hook (US) 3.75 mm
-4 Ply Yarn: white/off-white/OR ivory AND grey, black or brown -- or whatever colors you want to use.
-Soft stuffing

Special Stitches:

Magic Circle

Puff Stitch (ps)Yarn over (yo), insert the hook in the stitch, yarn over, draw the yarn through the stitch, yarn over, and draw the yarn through the 2 loops on the hook. In the same stitch, repeat the preceding step twice. Yarn over and draw the yarn through all 4 loops on the hook.

Ear Picot (ep): sc in next st, ch 3, ss in 3nd ch from hook.

Abbreviations:

dec: decrease = sc next 2 st together.
ep: ear picot (see special stitches)
inc: increase = 2 sc in next same stitch.
ps: puff stitch (see special stitches)
scbl:  single crochet in back loop ONLY.

Instructions:

Tip: since you are working in rounds, make sure you use a stitch marker so you don't lose count.

Head/Face

Make a magic circle.

Rnd #
1:  sc 6 in magic circle and pull tight. (6 st)
2:  sc 6. (6 st)
3:  (sc, inc) x3 (9 st)
4:  sc 2, ep, (inc) x3, ep, sc 2 (12 st)
5:  (inc) x2, scbl (work behind the ear), scbl, sc 5, scbl (work behind ear), scbl, inc. (15 st)

Switch to white or ivory (to make a smooth color change, check out this video tip!)

Body

6:  scbl 7, (inc) x3, sc 5 (18 st)
7:  (hdc, ps) x9 (18 st)
8:  (sc 2, inc) x6 (24 st)
9:  (hdc, ps) x12 (24 st)
10:  (sc 2, dec) x9 (18 st)
11:  (hdc, ps) x9 (18 st)
12:  (sc, dec) x6 (12 st)  STUFF NOW!
13:  (dec) x6 (6 st)
14:  (dec) x3 to close off OR you can try this super cool close off method that I LOVE: click here!! (the tutorial is near the bottom of the page with pictures included)

Legs (Make 4)

Magic circle with 2nd color (non-white)

1:  sc 6 into circle and tighten (6 st)
2:  scbl 6 (6 st)
3:  sc 6 (6 st)

Fasten off leaving long tail to use to stitch on body.

Tail

With 2nd color, non-white, Magic circle and sc 6 and tighten circle.  Fasten off leaving tail to use to attach.

Finish off!!

Stitch on the parts by following the picture or how you would best like.


Donkey Pattern for Nativity

Pattern and Design by Catherine Lang 2015 @ theworstedcrochetblog.blogspot.com 


You will need:

-F Hook (US) 3.75 mm
-4 Ply Yarn: white/off-white/OR ivory, grey, black, and brown -- or whatever colors you want to use. -Soft stuffing

Special Stitches:

Magic Circle

Special Ear Picot (sep): sc in next st, ch 4, ss in 2nd ch from hook, sc 2 (down the ch), ss in front of bottom of the original sc before the ch -- see picture below for where to insert hook for the last ss:


Abbreviations:

dec: decrease = sc next 2 st together.
sep: special ear picot (see special stitches)
inc: increase = 2 sc in next same stitch.
scbl:  single crochet in back loop ONLY.
sc3tog: single crochet next 3 stitches together.

Instructions:

Tip: since you are working in rounds, make sure you use a stitch marker so you don't lose count.

Head/Face/Body

Make a magic circle with white/ivory.

Rnd #
1: sc 6, pull circle closed tight (6 st)
2: sc 6 (6 st)
3: (sc, inc) x 3 (9 st)

Change to grey, (to make a smooth color change, check out this video tip!)

4: sc 3, (inc) x 3, sc 3 (12 st)
5: sc 3, (inc) x 6, sc 3 (18 st)
6: sc 18 (18 st)
7: (sc, dec) x 6 (12 st)
8: sc 4, sep, sc 3, sep, sc 3 (10 st + 2 ears = 12 st)
9: (dec) x2, scbl, ch 1 (work behind the ears), sc3tog, scbl, ch 1 (work behind the ear), dec, sc. (9 st) Start stuffing NOW -- and stuff the neck as you go along.

10: inc, sc 2, sc in ch sp, sc 2, sc in ch sp, sc, inc. (11 st)
11: (inc) x 2, sc 3, (dec) x 2, sc, inc. (12 st)
12: (sc, inc) x 2, sc, (dec) x 3, inc. (12 st)
13: sc 2, (inc) x 2, sc 7, inc (15 st)
14: sc 2, (inc) x 3, sc 2, (dec) x 3, sc 2 (15 st)
15: sc 3, inc, sc 2, inc, sc 4, dec, sc 2 (16 st)
16: sc 5, (inc) x 3,sc 5, dec, sc (18 st)
17: sc 18 (18 st)
18: sc 6, (inc) x 6, sc x 6 (24 st)
19-28 (10 rounds): sc 24 (24 st)
29: (sc x 3, dec) x 4, sc 4 (20 st)
30: sc 20 (20 st)
31: (sc 2, dec) x 5 (15 st)

Finish off stuffing body NOW!

32: (sc, dec) x 5, dec (10 st)
33: (dec) x 5 (5 st)
34: dec until sewn up to close off OR you can try this super cool close off method that I LOVE: click here!! (the tutorial is near the bottom of the page with pictures included)

Legs- Make 4

Magic circle with black yarn.

1: sc 6, tighten circle (6 st)
2: scbl 6 (6 st)
3: sc 6, (6 st)
Switch to grey yarn
4-8 (5 rounds): sc 6 (6 st)

Fasten off leaving a tail for sewing onto body later.

Tail

With grey yarn ch 7,  ss in 2nd ch from hook, ss 2, sc 3 (6 st)

Fasten off leaving a tail to attach to body.  Tie on black fringe on the bottom.  I do it the same way I do the mane: see bottom picture guide.

Mane


Halter

With brown yarn ch 25, ss in 13th ch from hook, ch 12, ss to first chain and fasten off.

Finishing Off

Attach the parts using my pictures as guides or however you want!

If you have any questions, feel free to contact me @ nutsinanutshell(at)gmail(dot)com. Enjoy!!!

-Cat


(Note: You can find Part 1 of the Nativity Set: Mary, Joseph, Baby Jesus, Angel, & Stable here!)

Pin It

Saturday, March 23, 2013

Rose's Scarf from "Boomtown"

Any Doctor Who Fans out there?

If you are a fan, and you crochet or knit, I am pretty sure you didn't miss the fabulous scarf that Rose wears in the episode called, "Boomtown" in season 2.


If you aren't a fan.  Sad for you.  I mean really.  Just sad.

Some friends pointed me that way a couple months ago when I was down sick.  I thought I had wasted an hour of my life after the first episode.  But my friends assured me to get through the first season and I wouldn't regret it.  They were right.  I am totally hooked.

When I saw this scarf, I REALLY wanted one.  And I am not a scarf person... never have been.  My neck is short, I inherited a stocky-Scandinavian look.  But I REALLY liked this one.  So I did what any modern crocheter/knitter would do, I Googled it.  Turns out that the costumer just picked up the store at some little shop there in London and had no idea what the colors or pattern was.  Just great, thought all my fellow crafters out there.  However, they were not to be deterred.  Someone got some close up shots and figured that it was knitted and came up with her own pattern.  Nope don't knit.  Moving on... finally I found a pattern written in crochet format.  But no pictures.  It was alright, I told myself, I would try it out anyway and see what happened.

All the knitters and crocheters warned that the yarn in those colors was impossible to find.  Most determined that the scarf was probably dyed or something else.

I searched all the stores and the internet and they were right.  Those colors are no where to be found.  So I settled for some other colors.  And I wasn't disappointed with how they turned out either!

I actually couldn't decide between two different ways, so I made two scarves and here is what I used:

You can find the pattern HERE! (or here)
Design by Elizabeth at vivonelcarmelo.livejournal.com

Scarf #1:

 I used Impeccable Impecable by Loops & Threads sold at Micheal's:


I did two rounds of the pattern before switching colors (so every 6 rows), I did it with the 2nd scarf as well.  Only there are 2 colors in the above one, and 4 on the other.

Here I am playing model with the scarf above.  Don't laugh.

Scarf #2:
I wasn't satisfied with just the scarf above.  Don't get me wrong, I LOVED it. But I wanted something with lots MORE different colors like the original Rose scarf.  So I came up with this one:


The yarn for this one was a little thinner, just a different brand is all, and so the scarf is about an inch thinner.  Which is fine with me because the variety between the two is great!  Now I have a scarf for every outfit!

Here is the yarn I used for this one:

I used Red Heart's With Love series (Now I am not a fan of Red Heart normally, but the With Love series is super soft!) I found 2 of these colors at Jo-ann's and the other two I had to order from Walmart:

  • Beachy
  • Waterlily
  • Autumn
  • Fruit Punch
Here is me once again playing model.  Same No Laughing rule applies:
Anyway, whether or not you are on Team Doctor, this is a lovely scarf, easy and quick to make (I made the 2nd in a couple hours while I watched a movie the other night), and just plain fun to wear!  

Happy Crocheting!

-Cat
Pin It

Monday, March 11, 2013

Updated Striped Hat Pattern!! (3 Sizes!)

I finally got this pattern worked out for Child/ Women's/ and Men's sizes.  This pattern IS different from the other version... but I thought this was a little easier to follow.


Materials: 

· I hook (hat body) and H hook (bottom rim)

· 4 colors of Worsted, Med yarn. (I used Vanna’s choice Sapphire, Chocolate, Mustard, and Olive)

Special stitch: 
This diagram shows where the horizontal bar (or diagonal looking stitch) is located (on WRONG SIDE of rnd):
ALL SIZES:

Ch 4, ss to 1st ch to form loop (or do a magic circle), ch 2.

Rnd 1: With color #1: Work 8 hdc into loop. Join with ss to back horizontal bar (or diagonal loop -- that's what it looks like to me!) behind beginning (you will do this through the whole pattern! See special stitch picture above) ch 1. Change to color #2. (8) ch 1.

Rnd 2: Work 2 hdc in same st as joining (always do this at the beginning of each row). 2 hdc in each back diagonal st around. This will make the stripes stand out, so remember to always do it throughout pattern. Join & change to color #3. (16) ch 1.

Rnd 3: 2 hdc in same st as joining, 1 hdc in next st. * 2 hdc in next st, 1 hdc in next st. Repeat from *. Join & change to color # 4. (24) ch 1.

Rnd 4: 2 hdc in same st as joining, hdc in next 2 st. * 2 hdc in next st, hdc in next 2 st. Repeat from *. Join & change to color # 1. (32) ch 1.

Rnd 5: 2 hdc in same st as joining, hdc in next 3 st. * 2 hdc in next st, hdc in next 3 st. Repeat from *. Join & change to color # 2. (40) ch 1.

Rnd 6: 2 hdc in same st as joining, hdc in next 4 st. * 2 hdc in next st, hdc in next 4 st. Repeat from *. Join & change to color # 3. (48) ch 1.

I used 3 colors on this one
and it just didn't have the
same look as the 4. For
beard pattern see links
below!
Child's Size: (Small)

Rnd 7-18: hdc in each st around changing colors after each row. (48) (Note: always feel free to make the hat shorter or longer by taking out rows or adding them)

Rnd 19: With H hook: sc in back diagonal loops around.

Rnd 20-22: sc around in each sc stitch.

Fasten and finish off.

Women's Size: (Medium)

Rnd 7: 2 hdc in same st as joining, hdc in next 5 st. * 2 hdc in next st, hdc in next 5 st. Repeat from *. Join & change to color # 4. (56) ch 1.

Rnd 8-20: hdc in each st around changing colors after each row. (56) (Note: always feel free to make the hat shorter or longer by taking out rows or adding them)


Rnd 21: With H hook: sc in back diagonal loops around.

Rnd 22-24: sc around in each sc stitch.

Fasten and finish off.


Men's Size: (Large)
For beard pattern see links below!

Rnd 7: 2 hdc in same st as joining, hdc in next 5 st. * 2 hdc in next st, hdc in next 5 st. Repeat from *. Join & change to color # 4. (56) ch 1.

Rnd 8: 2 hdc in same st as joining, hdc in next 6 st. * 2 hdc in next st, hdc in next 6 st. Repeat from *. Join & change to color # 4. (64) ch 1.


Rnd 9-22: hdc in each st around changing colors after each row. (64) (Note: always feel free to make the hat shorter or longer by taking out rows or adding them)


Rnd 23: With H hook: sc in back diagonal loops around.

Rnd 24-26: sc around in each sc stitch.

Fasten and finish off.


NOTE:  The beard patterns are my own design, but I haven't had a chance to write them up yet.  HOWEVER, you can find a similar patterns for free HERE and HERE!!

Happy Crocheting!

-Cat
Pin It

Monday, January 21, 2013

FREE Fun Valentine Patterns!

Valentine's Day is just around the corner and it's almost time to decorate. If you haven't started yet, here are some really cute patterns to get you going. I just love these! (All titles are linked to the appropriate site for credit)

Click on the titles to be taken to the pattern at the original website.

To start off with here is a great video on How to Crochet a Valentine Rose.


For the pet lover, these are really cute!


Another option:


As we find more patterns we'll try to post them on here so you have them. I hope you enjoy these patterns and have a great time crocheting! 
Pin It

Saturday, December 29, 2012

Patterns Coming Soon!!

Things have been crazy for ALL of us this Christmas season.  And I know we haven't been keeping up to date, BUT It doesn't mean we haven't been plotting and planning for what comes next!

I have some patterns all written out... not yet typed or with pictures, but getting ready to post.  Among those are the children's, woman's, and updated men's versions of this hat:
The super popular Striped Hat.

I have also written a pattern for the popular beard, that goes GREAT with the striped hat above:

I have also designed 2 different types of fun mustaches, the handlebar (as seen above) and the curled up mustache (for the sillier among us).

I made these for my family this year, and it was the BIG HIT!  It was amazing to me that something so simple could bring so much laughter and fun.  It was great.

These patterns will all be posted no later than the end of next week.

Happy Crocheting!! Pin It

Thursday, December 6, 2012

Gingerbread Boy & Girl

After searching the internet for ideas, I finally came up with a Gingerbread Boy & Girl that I like.  Some of it is just me, and then some of the other ideas come from about 3 other patterns that you can find online.

The Gingerbread Hats

Here are a couple pattern ideas if you want to make one of your own:

A Chick w/ Sticks
Repeat Crafter Me

If you would like to purchase one of these hats (Newborn - child sizes only), they are $25 each or two for $48.

Links to my Etsy listings:

Gingerbread Boy
Gingerbread Girl
Both Hats Together

Adult Sizes link ($28)

-Cat Pin It

Tuesday, November 27, 2012

Men's Striped Beanie Pattern FREE

As promised, here it is!  I hope you all enjoy making it as much as I do!  Note:  I did promise you the woman's pattern too, and I have it all written up, just not typed and no pictures, but I will get it up this week, I PROMISE! Also, I just want to give a huge thanks for your support!  Please keep spreading the word about our blog.  The more traffic we get the more FREE stuff we can offer. Thanks again!
-Cat

Materials: 

· I hook (hat body) and H hook (bottom rim)

· 4 colors of Worsted, Med yarn. (I used Vanna’s choice Sapphire, Chocolate, Mustard, and Olive)

Special stitch: 
This diagram shows where the horizontal bar (or diagonal looking stitch) is located (on WRONG SIDE of rnd):

Ch4, ss to 1st ch to form loop (or do a magic circle), ch 2.

Rnd 1: With color #1: Work 12 hdc into loop. Join with ss to back horizontal bar (or diagonal loop -- that's what it looks like to me!) behind beginning (you will do this through the whole pattern! See special stitch picture above) ch 1. Change to color #2. (12) ch 1

Rnd 2: Work 2 hdc in same st as joining (always do this at the beginning of each row). 2 hdc in each back diagonal st around. This will make the stripes stand out, so remember to always do it throughout pattern. Join & change to color #3. (24) ch 1

Rnd 3: 2 hdc in same st as joining, hdc in next 2 st. * 2 hdc in next st, hdc in next 2 st. Repeat from *. Join & change to color # 4. (32) ch 1.

Rnd 4: 2 hdc in same st as joining, hdc in next 4 st. * 2 hdc in next st, hdc in next 4 st. Repeat from *. Join & change to color # 1. (39) ch 1.

Rnd 5: 2 hdc in same st as joining, hdc in next 6 st. * 2 hdc in next st, hdc in next 6 st. Repeat from *. Join & change to color # 2. (45) ch 1.

Rnd 6: 2 hdc in same st as joining, hdc in next 6 st. * 2 hdc in next st, hdc in next 6 st. Repeat from *. Join & change to color # 3. (52) ch 1.

Rnd 7: 2 hdc in same st as joining, hdc in next 7 st. * 2 hdc in next st, hdc in next 7 st. Repeat from *. Join & change to color # 4. (59) ch 1.

Rnd 8: 2 hdc in same st as joining, hdc in next 8 st. * 2 hdc in next st, hdc in next 8 st. Repeat from *. Join & change to color # 3. (66) ch 1.

Rnd 9-20: hdc around (66). (Note: always feel free to make the hat shorter or longer by taking out rows or adding them)

Rnd 21: With H hook: sc in back diagonal loops around.

Rnd 22-23: sc around in each sc stitch.

Fasten and finish off. 

That's it!  Let me know if you have any questions!

-Cat

UPDATE 3/11/2013

I have redesigned this pattern AND added child and women sizes!!!!  Here is the link!

Pin It

Monday, November 26, 2012

Great Christmas Crochet Patterns FREE
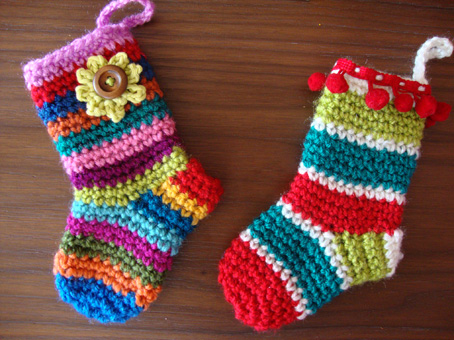
I am so excited for the Christmas season this year!  I don't know if it has to do with living in a new home, and having plenty of places to decorate, or the fact that my kids are at an age where Christmas is simply magical!

Since our previous posts pointing you all towards some fun seasonal patterns out there on the web seemed to be pretty popular, I thought I would mention some fun Christmas and Winter ones as well. (All titles and pictures are linked to the appropriate site for credit)

(I think this can be easily adjusted to bigger sizes as well)
(Can be used as finger puppets)
All the patterns are at this link, you just have to scroll down the blog half way to find the download links.


Click on the link above to see how cute it is on a baby!!

Happy Crocheting!!
-Cat

If you like this post and others that we put together, please like us on Facebook or follow this blog.  Thanks! Pin It
Related Posts Plugin for WordPress, Blogger...